My modified Bachmann model of 37019 (coming soon)
My Bachman/Lima hybrid of 37207
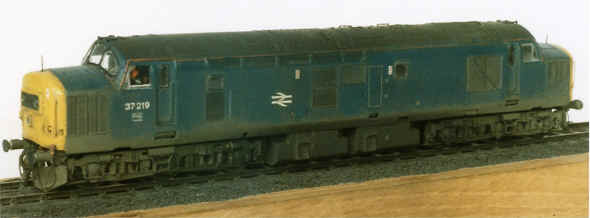
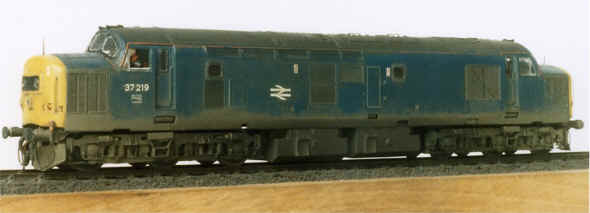
James Wells model of 37219 (description coming soon)
![]()
Here are some pictures of the results from a couple of DEMU members attempts at making a realistic looking Class 37.
My modified Bachmann model of 37019 (coming soon)
My Bachman/Lima hybrid of 37207
James Wells model of 37219 (description coming soon)
Work was carried out in 4 main areas (Sides, Roof, Ends and windscreen. Hang on, isn't that a complete loco?)
Model has now been striped bare in preparation of an identity change. All the class 37s for mainline will now be modelled from the new Bachmann one.
A section was cut from the Bachmann model, this comprised just the tumblehome up to the door, where the cut goes upwards to just below the cantrail, and across to the other door and with just the tumblehome on the nose. Once the Bachmann side was chopped up a hole was cut into the lima bodyshell that was the same size as the Bachmann section. Finally before attaching the two parts together, the radiator grill was shifted by a couple of mm to get it in the correct position. The new sides were then glued into position with 'Mek Poly' (a pretty potent solvent available from Intercity Models), this was then reinforced with a LOT of superglue (about half a jar per loco was used!) After lots of filler was added to smooth off the sides, finally the nose grills were added (Hurst Models etchings). This is shown on figure 1, with the the 'Dutch' Livery parts being lima, and the Regional Railways parts Bachmann (As usual, click on the link to go to a full sized image on fotopic). Still to be added at this stage are the Shawplan etched frost grills (although that will only be on 37207).
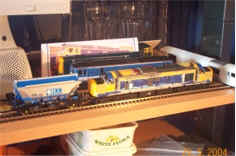
Figure 1, the side;
Here work involved lowering the headcode box, replacing the windscreen and adding sandbox fillers to the Lima nose. To do this I started by filing the Lima nose flush, then chain drilled around the Bachmann headcode boxes. Measurements were then taken of the new box, and using photos of 37 207 I drilled a hole just large enough for it and glued it in. The other job on the nose ends was the replacing of the Lima sandbox fillers (which were almost flush with the body side) with the much better ones off the Bachmann model. This was completed by drilling out 4 holes and filing them square, before adding an angled piece of plasticard in and the cap from the Bachmann model. Finally its onto the cab windows, my first conversion (as well as my first class 40) used Clive Mortimer's method of filing on the angles, then completing with plasticard and the craftsman etch. I was finding it hard to get 2 ends the same, yet alone 2 locos so I had a look at other options and came up with the idea of using the original Bachmann windscreen. The actual process was relatively straight forward, cut out part of the lima cab, add the Bachmann piece, then file to shape. It took a while but I am pleased with the result, it also has the added benefit of having the recesses for the horns, and the Bachmann glazing still fits. The almost completed nose is shown in figure 2, (apologies for the low res image.)
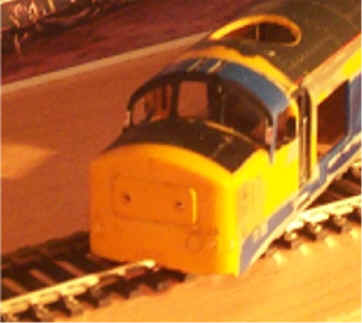
Figure 2, the nose;
Finally we get to the roof, there were 3 areas of work here. First was converting the roof to the centre box arrangement. (Basically involved removing a load of ribs, then adding new boiler port detail.) Next up was the grill, another brilliant Shawplan etch fitted in the usual way. Finally was the exhaust ports, this was cut out and replaced with the Bachmann part. A slow time consuming job that makes very little difference to the finished model, as such it will not be repeated on any future models.
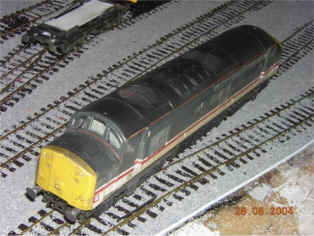
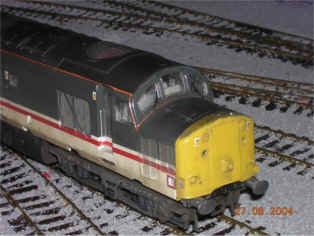
After a coat of BR blue, some weathering from photos and with the nameplates and frost grills added the model is shown below, it is still waiting for fox to bring out Cornish railways transfers (which are apparently due any time now.
![]()
More Details coming soon:
![]()
(description coming soon)
![]()
( Lima body with Bachmann tumblehome, Details coming soon)